
Creating your own cryptocurrency/token on Ethereum Network

Developing, testing and deploying the smart contract token on Ethereum Network.
The buzz around bitcoin, Ethereum, Dogecoin, Shib coin and the superset blockchain is getting high and constantly going upwards. As all leading tech people started understanding the applications of decentralization in our day-to-day life. Hence, we constantly hear the words like Dapps, Defi, DAO.
But what if I say creating your cryptocurrency like bitcoin, Ethereum is as simple as writing a simple mathematical program. All you need is a basic understanding of blockchain, a few lines of code in solidity and some ETH in your crypto wallet.
Things needed to develop cryptocurrency
-
Geth – Go Ethereum – To access ETH blockchain mainnet and run local EVM
-
Truffle suite – Solidity Development Framework
-
Ganache– Test Environment
-
Metamask chrome extension – To create wallet address
-
HDWalletProvider - To sign the transaction with address
-
Infura - To deploying it in the Ethereum mainnet/ Ropsten
Pre-requisites
Basic understanding of blockchain and its way of working (nodes, mining and smart contract, Gas for Ethereum)
That’s it. Even though it looks like a sizable list, it’s very easy to understand and develop your token.
Note: - Token = cryptocurrency, so to make it generic I refer to cryptocurrency as a token in this entire writeup.
For the full code visit the below Github url : https://github.com/vickycj/cryptotokenethereum
Installing Geth – Go Ethereum
Go Ethereum or Geth is a client for Ethereum blockchain through which we can run a local EVM (Ethereum virtual machine). EVM is platform-independent, So Geth can run on any OS like MAC Windows, Android, IOS.
Install Geth from https://geth.ethereum.org/docs/install-and-build/installing-geth
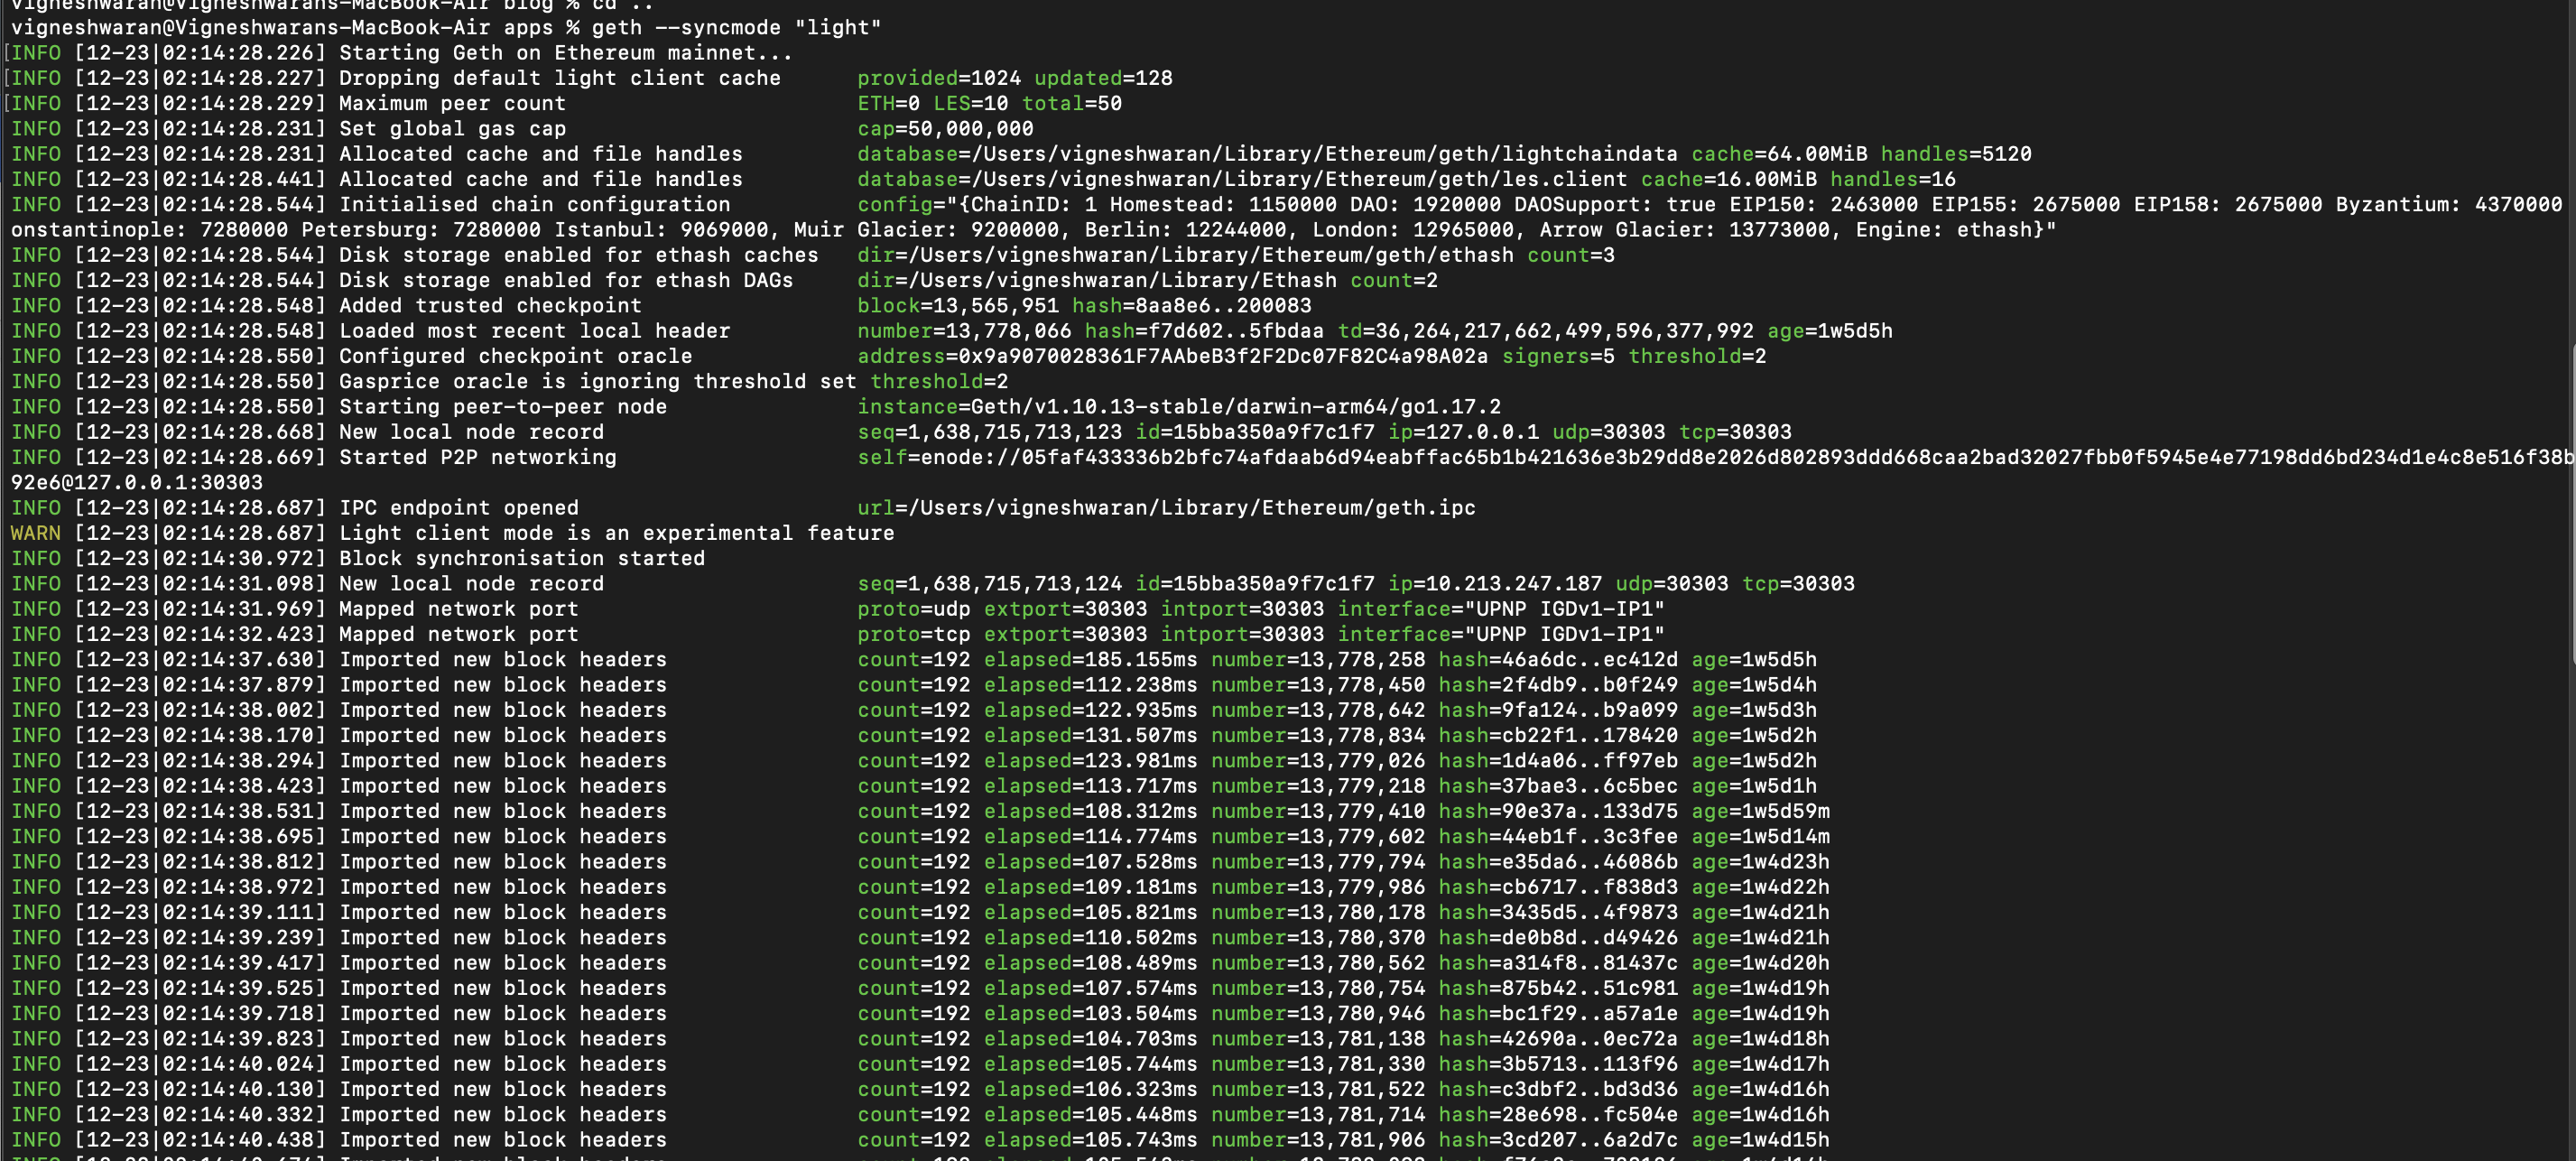
geth --syncmode “light” After installation run the above command on terminal. This will make our machine as oof the Ethereum node and starts downloading the Ethereum blockchain from one of the peers as below.
Installing Truffle suite.
Truffle is one of the easiest and most popular development frameworks for Ethereum. It makes our life easier by installing the right compiler for solidity and automating the deployment scripts.
We can install truffle from https://trufflesuite.com/truffle/ which is simply npm install truffle –g
Once installed go to the desired folder and run truffle init
This will create all the required folders and a config file.
It has two main folders and a config file.
Contracts - this is where we will add our smart contract of our own currency
Migration – here we need to add a migration file to deploy our contract over the network
Config – Here we write all the basic config related to the development and deployment
Writing your smart contract.
A smart contract is a piece of code that runs and handles the state of the variables. This state holds the balance of each address, details about your currency and the total supply of your tokens. We are going to write our smart contract based on ERC20 which is the standard protocol for Ethereum based tokens. This helps other wallet providers and other Dapps to easily engage with our token.
As mentioned earlier, ERC20 is a protocol, basically an interface in terms of programming. We need to implement our functions based on the ERC20 contract.
interface ERC20 {
    function totalSupply() external view returns (uint256);

    function balanceOf(address account) external view returns (uint256);

    function transfer(address recipient, uint256 amount)
        external
        returns (bool);

    function allowance(address owner, address spender)
        external
        view
        returns (uint256);

    function approve(address spender, uint256 amount) external returns (bool);

    function transferFrom(
        address sender,
        address recipient,
        uint256 amount
    ) external returns (bool);

    event Transfer(address indexed from, address indexed to, uint256 value);
    event Approval(
        address indexed owner,
        address indexed spender,
        uint256 value
    );
}
Below is the code for the token contract. The part that needs to be changed in the constructor, where we need to change according to our need.
The functions and its operations are straight forward, if needs explanation will do an individual post separately.
// SPDX-License-Identifier: MIT
pragma solidity ^0.8.10;

import "./ERC20Interface.sol";

contract VickyCoinToken is ERC20 {
    uint256 private constant MAX_UINT256 = 2**256 - 1;
    mapping(address => uint256) public balances;
    mapping(address => mapping(address => uint256)) public allowed;

    uint256 public totSupply;
    string public name;
    uint8 public decimals;
    string public symbol;

    constructor() {
        totSupply = 100000000000000;
        balances[msg.sender] = totSupply;
        name = "VickyCoin";
        decimals = 1;
        symbol = "VCN";
    }

    function transfer(address _to, uint256 _value)
        public
        returns (bool success)
    {
        require(balances[msg.sender] >= _value, "No funds available");
        balances[msg.sender] -= _value;
        balances[_to] += _value;
        emit Transfer(msg.sender, _to, _value);
        return true;
    }

    function transferFrom(
        address _from,
        address _to,
        uint256 _value
    ) public returns (bool success) {
        uint256 allowanceAllowed = allowed[_from][msg.sender];
        require(
            balances[_from] >= _value && allowanceAllowed >= _value,
            "Funds not allowed"
        );
        balances[_to] += _value;
        balances[_from] -= _value;
        if (allowanceAllowed < MAX_UINT256) {
            allowed[_from][msg.sender] -= _value;
        }
        emit Transfer(_from, _to, _value);
        return true;
    }

    function totalSupply() public view returns (uint256 totSupp) {
        return totSupply;
    }

    function balanceOf(address _owner) public view returns (uint256 balance) {
        return balances[_owner];
    }

    function approve(address _spender, uint256 _value)
        public
        returns (bool success)
    {
        allowed[msg.sender][_spender] = _value;
        emit Approval(msg.sender, _spender, _value);
        return true;
    }

    function allowance(address _owner, address _spender)
        public
        view
        returns (uint256 remaining)
    {
        return allowed[_owner][_spender];
    }
}
Now we successfully added our contract. Now we need to add our migration file under the migration folder. This file is required by truffle to identify the contract that needs to be deployed in the Ethereum network.
const token = artifacts.require("./VickyCoinToken.sol");

module.exports = function(deployer) {
    deployer.deploy(token);
};
Installing Metamask chrome extension.
Metamask is a wallet provider, when we create our token, it needs to be stored inside a wallet to transfer or send to anyone else in the network. Hence the wallet id/account id with the public and private key will be created by metamask. Metamask asks for mnemonics to be stored somewhere secured. This series of words is simply a private key combination with which we can recover our tokens even if we lose our machine.
Go to chrome web store and search for Metamask with the highest downloads. Or https://metamask.io/
And create a wallet in it, also remember the menomics to be stored somewhere secured.
Install HDwallet provider and create a project in Infura
HD wallet provider will sign the address that we created from the metamask mnemonic phrase.
This will make sure the sender address of the contract creation in the blockchain will be our address.
Hence the initial supply token will be credited to the address we are signing
npm install @truffle/hdwallet-provider
Now visit the url https://infura.io/ and create a project inside it for ethereum. Once we have created the project, we will be able to see the URL for the deployment. Infura helps in taking care of the deployment to the ethereum mainnet or the Ropsten test network.
Testing our smart contract (Local).
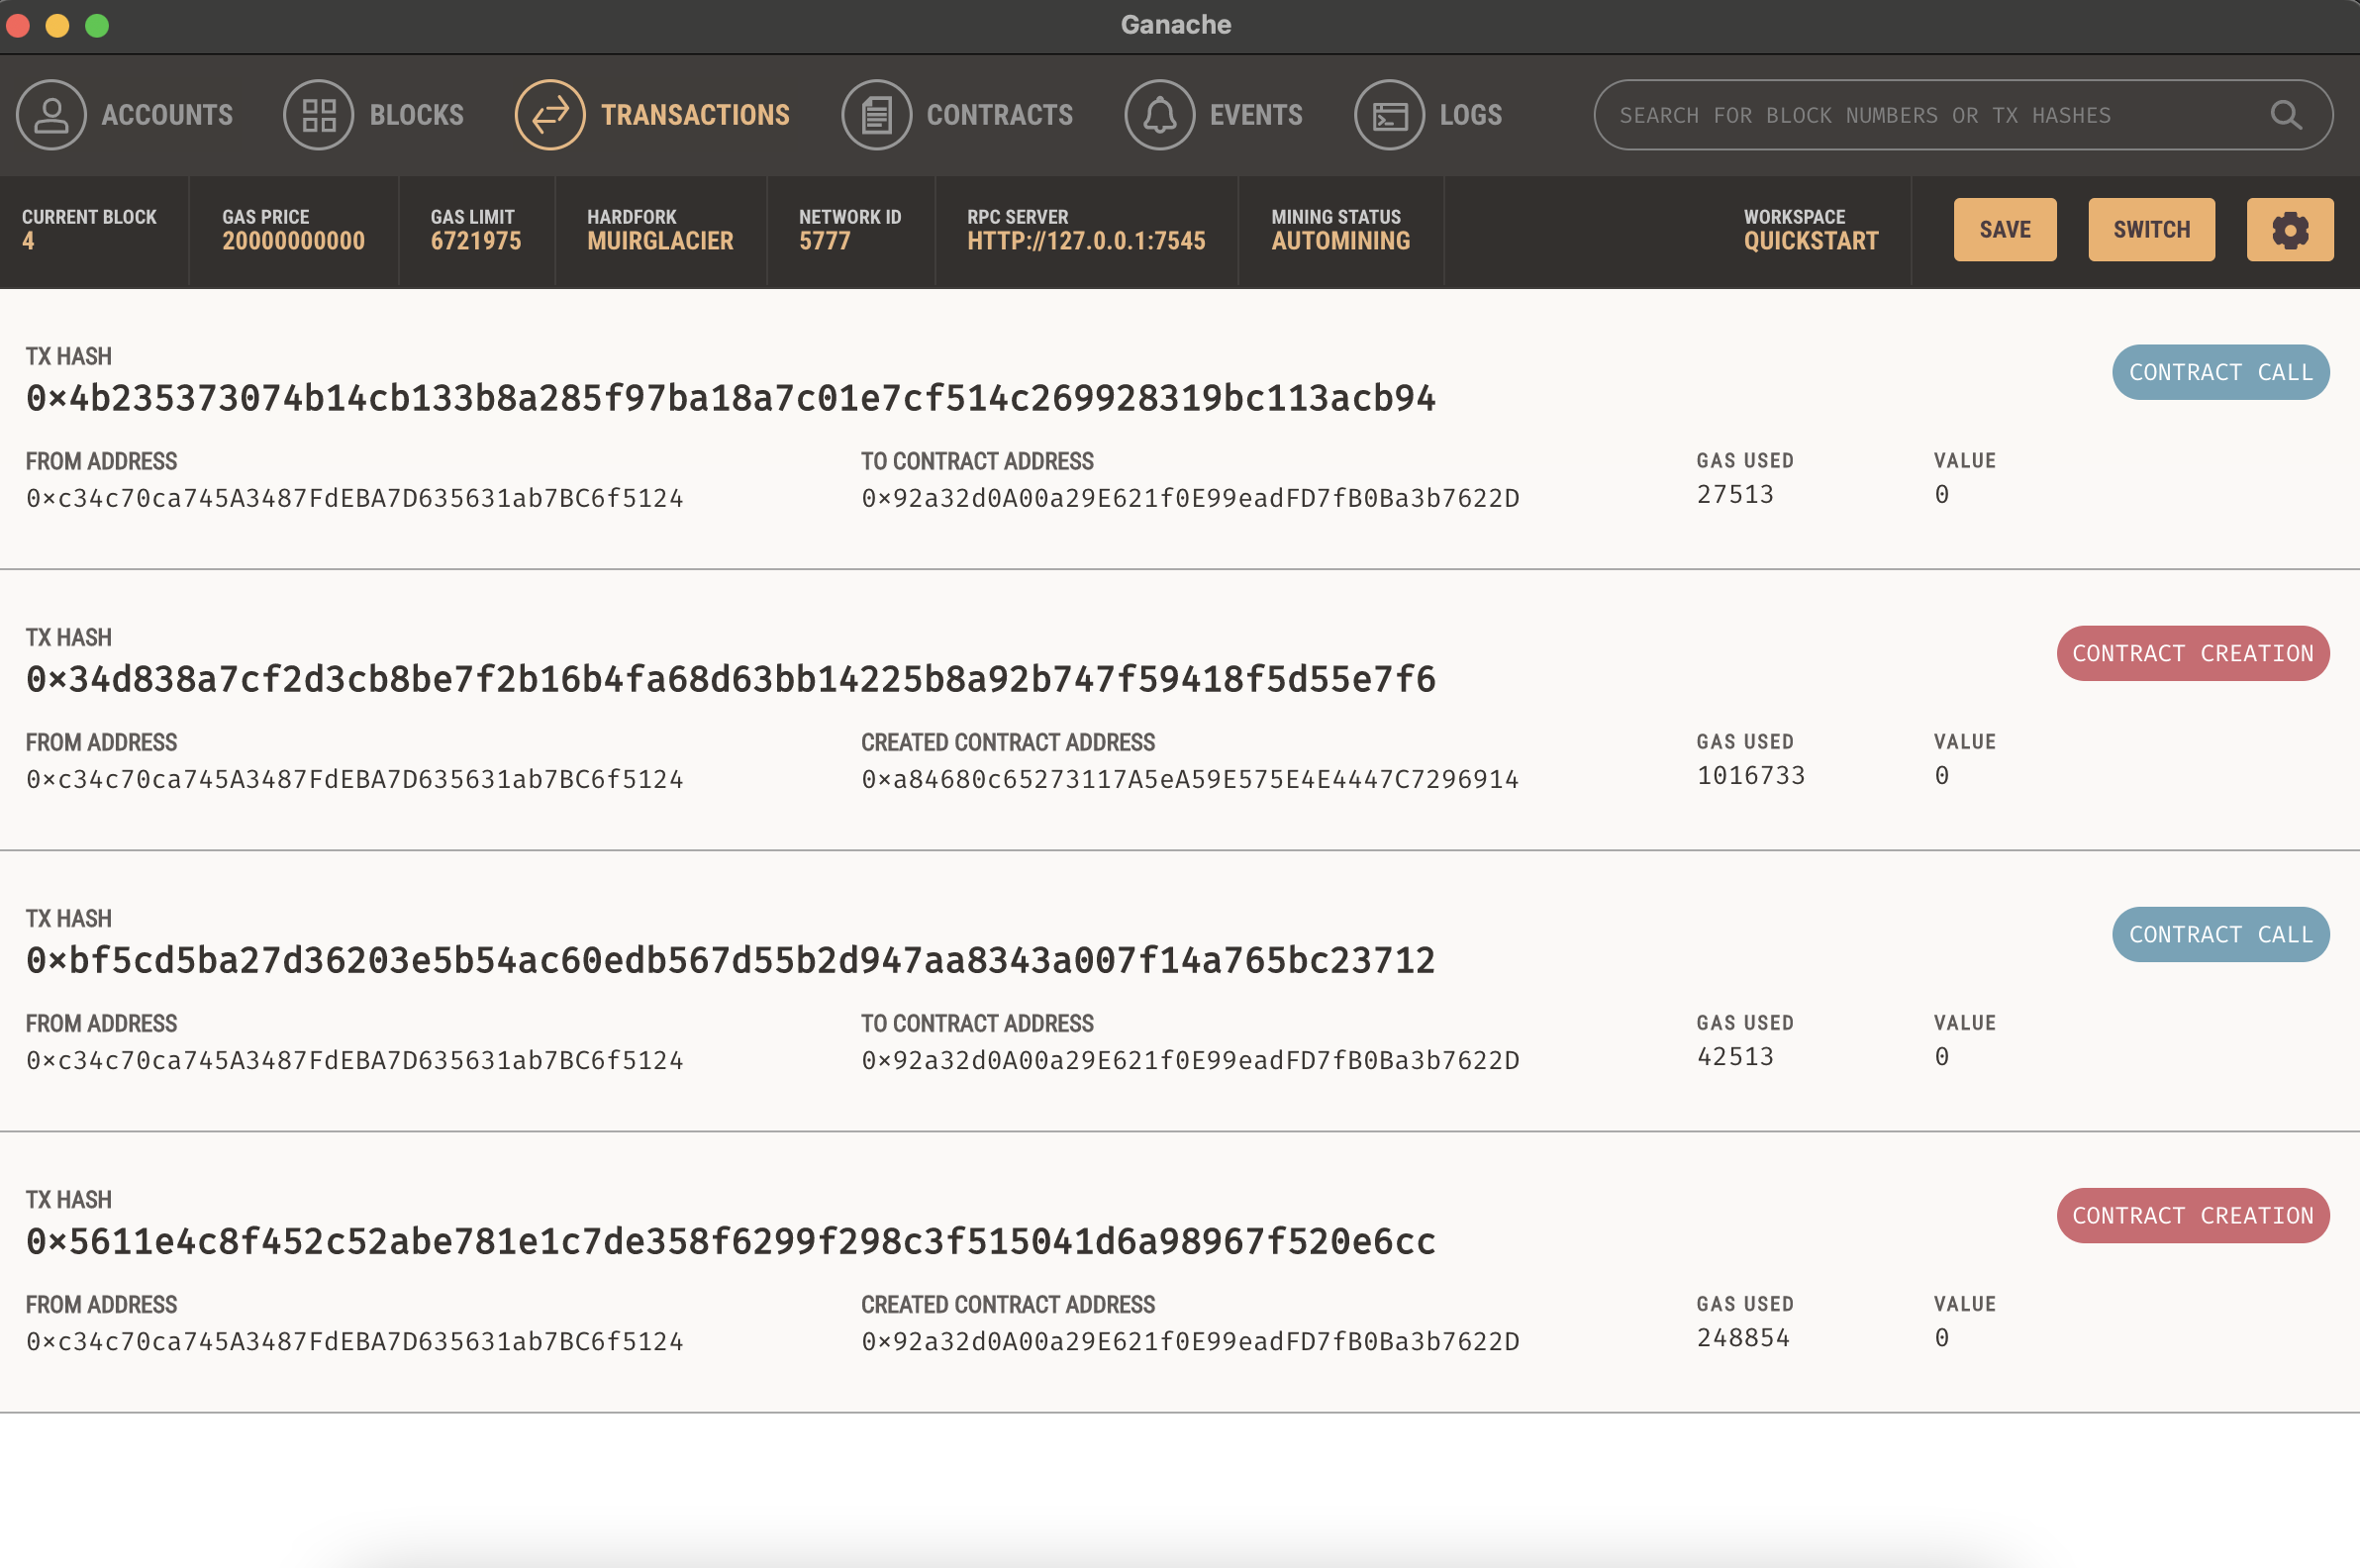
We can use Ganache to test our smart contract locally. Ganache is a local blockchain EVM that creates a dummy Ethereum locally with initial accounts created with 100ETH value. This is easier to run our tests locally. Once we start a ganache server, we will be able to see the HTTP URL running at a particular port. Now we need to add this port in the truffle config file under networks->development
    development: {
      host: "127.0.0.1",     // Localhost (default: none)
      port: 7545,            // Standard Ethereum port (default: none)
      network_id: "*",       // Any network (default: none)
    }
Now in terminal, run the below command
truffle deploy –reset 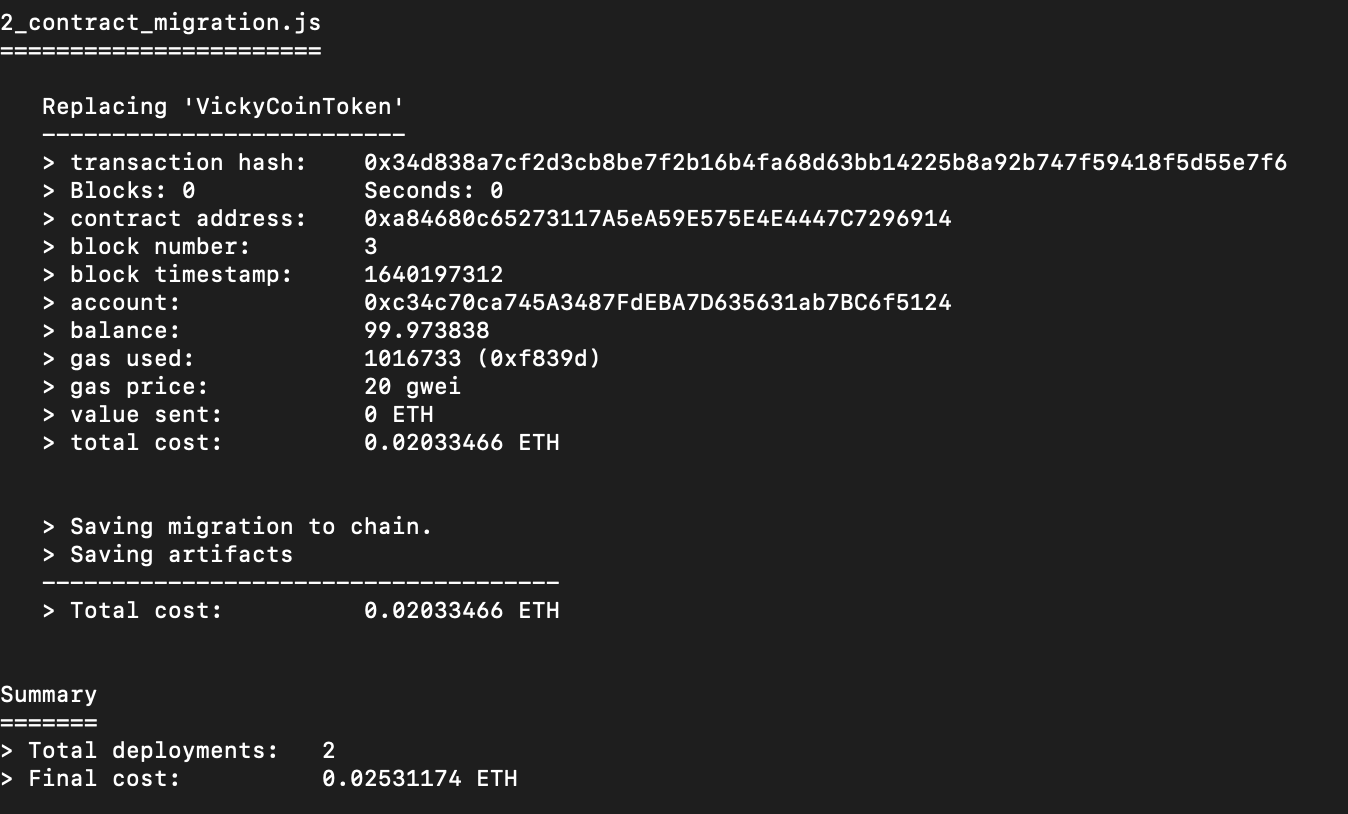
If we go to ganache, we will be able to see the transactions created, since ganache does automining all the transactions happens in seconds. But ideally it will take some time in real Ethereum network.
Testing our smart contract (Ropsten).
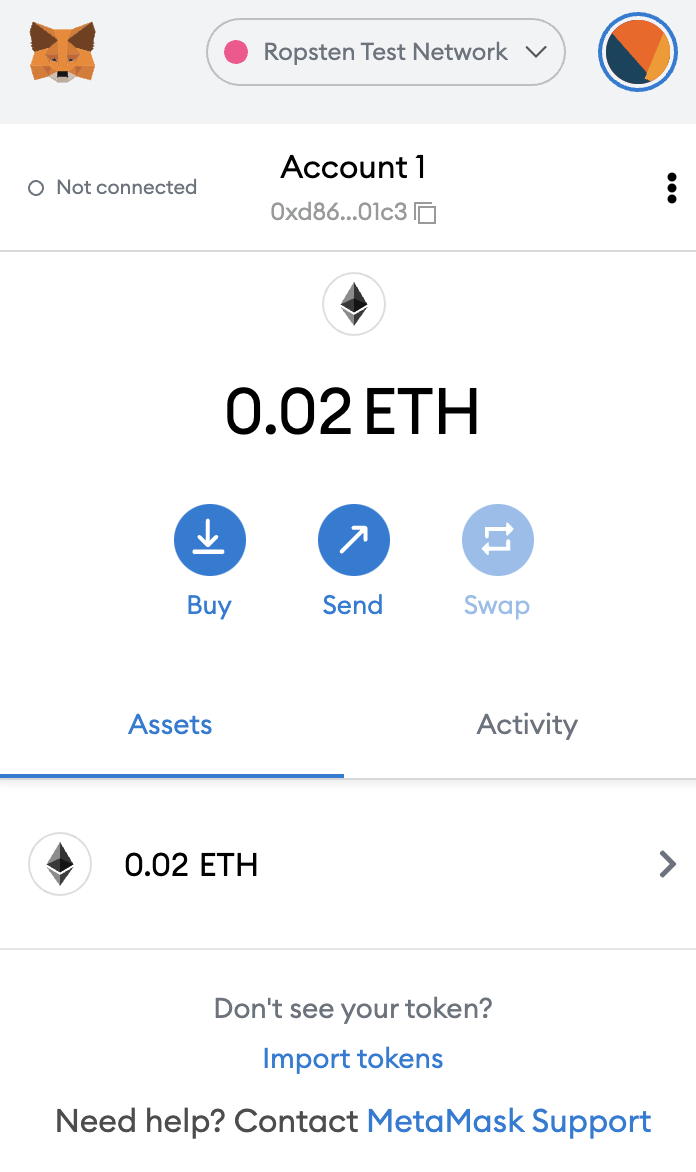
Ropsten provides real-world testing of the contract. It’s a real blockchain network with actual miniers mining, but for testing. We can deploy to it and test our smart contract without real money involved. For this, we need to go to metamask and filter the ropsten network instead of etheethereumnnet. From that copy the address from the top and go to https://faucet.ropsten.be/ and request for ETH.
ETH is required to deploy your code in the Ethereum blockchain as termed as Gas. This gas is computed based on the changes that we are doing to the blockchain. Hence, we need ether in our wallet inordeany sort of transaction in the blockchain. Now after requesting the test ether from the ropsten faucet we should have received it in the metamask wallet.
After receiving the ether go to the truffle config file and add the below code in the networks.
    ropsten: {
      provider: () => new HDWalletProvider(mnemonic, `https://ropsten.infura.io/v3/YOUR-PROJECT-ID`),
      network_id: 3,       // Ropsten's id
      gas: 5500000,        // Ropsten has a lower block limit than mainnet
      confirmations: 2,    // # of confs to wait between deployments. (default: 0)
      timeoutBlocks: 200,  // # of blocks before a deployment times out  (minimum/default: 50)
      skipDryRun: true     // Skip dry run before migrations? (default: false for public nets )
    },
To deploy the code to ropsten, run
truffle deploy --network ropsten –reset This will take the actual time and gas that requires to deploy your code in the ethereum network because it involves actual mining by the miners. Once it because it involves actual mining by the miners. Once it’s deployed you can check the metamask wallet, we will be able to see the ETH will be detected from it.
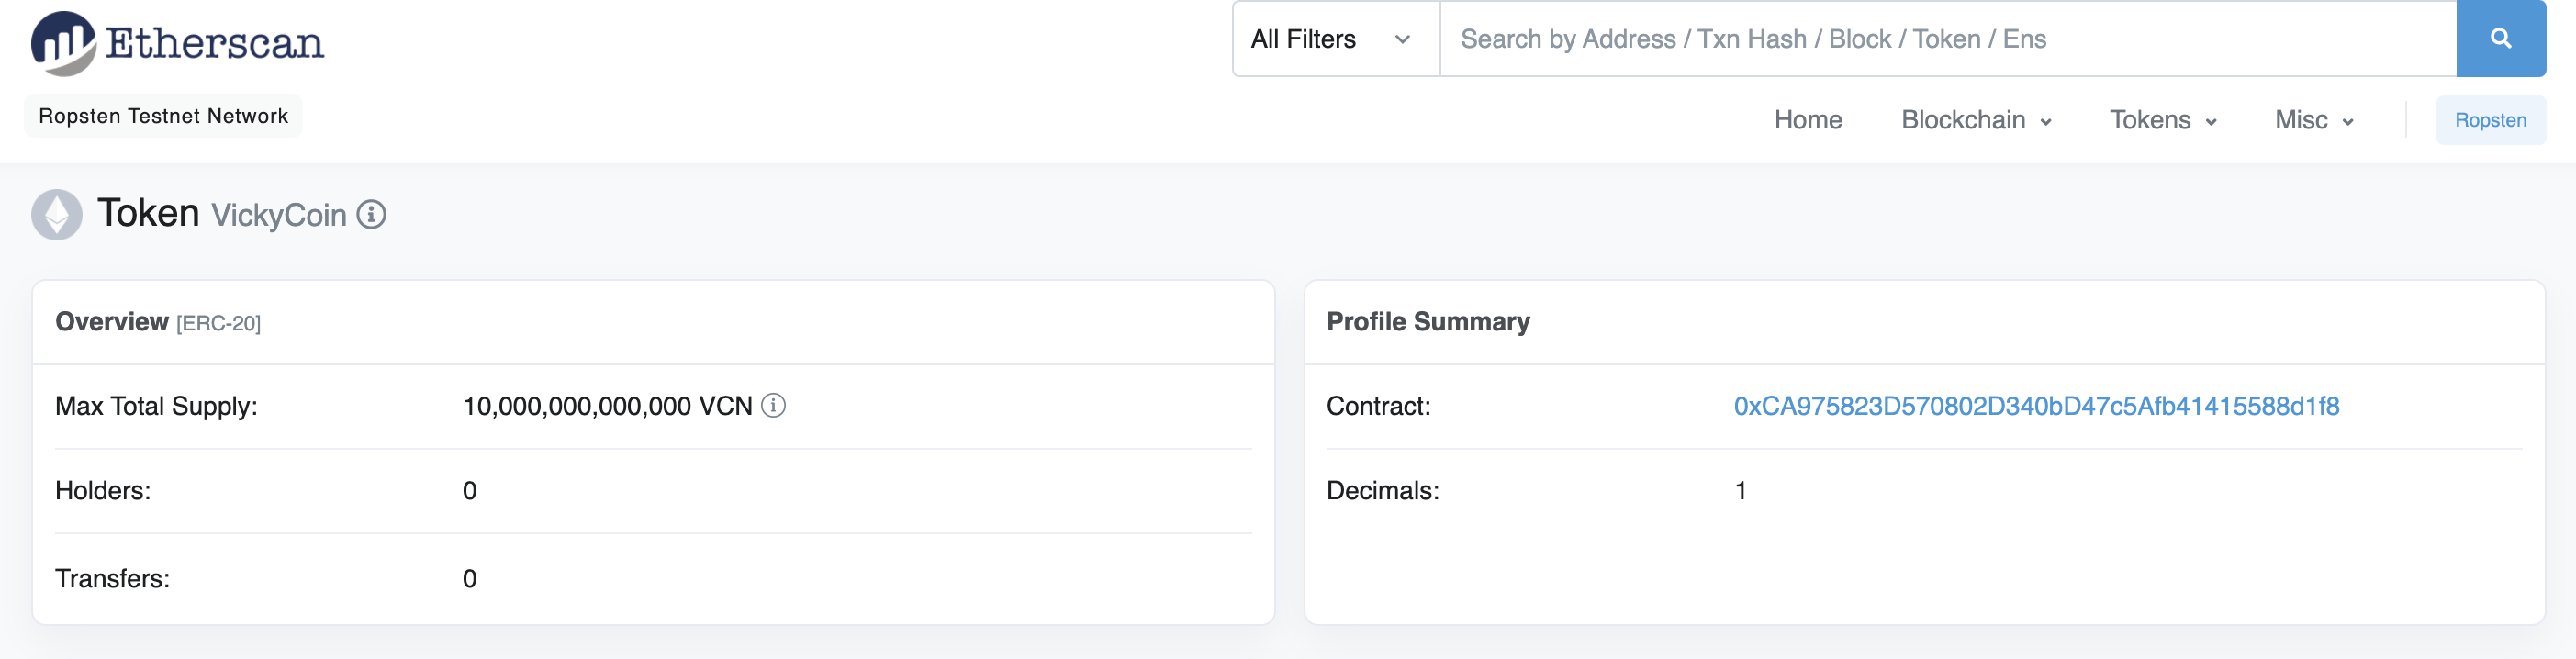
Also if we want to verify the transaction in the ledger, we can go to https://ropsten.etherscan.io/ and enter the contract address, or sender address which is the metamask ropsten address, we can see the actual ether detected for the gas and all the other transactions associated with it.
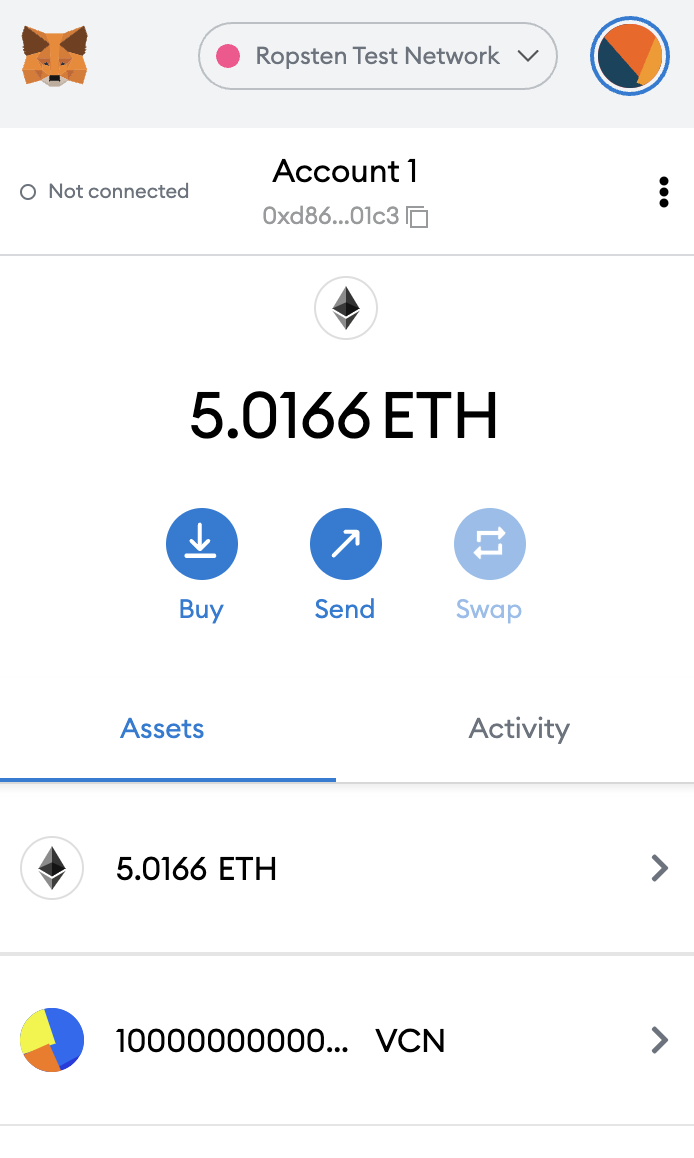
Also we can see the metamask the 1000000000 VCN coins added to the wallet.
Final deployment to the live ethereum mainnet.
This is an important step because, unlike other deployments, we on’t be able to revert the code or modify the code. The contract once deployed is final. So, we need to do thorough testing in local as well as in ropsten before deploying the code in mainnet.
Deploying it in mainnet requires actual money, at the time of writing deploying smart contract in ethereum network requires the approximate gas cost of 500$ equivalent ether in the wallet. In order to deploy your coin/token in the Ethereum network we need to change the config to add the live network infura url as below
live: {
      provider: function () {
        return new HDWalletProvider(mnemonic, "https://mainnet.infura.io/v3/YOUR-PROJECT-ID");
      },
      network_id: 1,
      gas: 7500000,
      gasPrice: 10000000000,
    }
And run the command
truffle deploy –network live –reset That’s it, voila, your own cryptocurrency/token deployed in the ethereum mainnet.
For the full code visit the below Github url : https://github.com/vickycj/cryptotokenethereum